Your Keurig coffee maker needs regular cleaning to brew perfect coffee every time. This guide shows you exactly how to clean your Keurig safely and effectively. A clean machine makes better-tasting coffee and lasts longer.
Why You Need to Clean Your Keurig

Learning how to clean your Keurig is essential for several important reasons:
- Better coffee taste – Mineral buildup affects flavor
- Prevents mold growth – Moist environments breed bacteria
- Extends machine life – Regular cleaning prevents damage
- Maintains brewing speed – Clogs slow down your machine
- Prevents health issues – Clean machines are safer to use
Calcium and scale are non-toxic, but left unattended, they can hinder your brewer’s performance. This makes regular cleaning absolutely crucial.
How Often Should You Clean Your Keurig?
The frequency depends on your usage patterns and water quality:
- Daily users: Clean every 3 months
- Weekly users: Clean every 6 months
- Hard water areas: Clean more frequently
- Soft water areas: Standard schedule works fine
For a fresh brew, it’s important to descale your Keurig every three to six months — three months if you use it daily.
Daily Maintenance: How to Clean Your Keurig Between Deep Cleans
Simple Daily Steps
Follow these easy steps to keep your Keurig clean daily:
- Replace water daily – Fresh water prevents bacteria growth
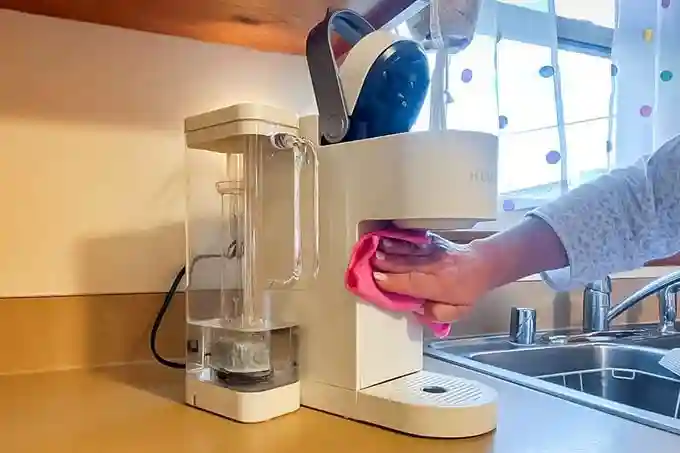
- Wipe exterior surfaces – Use a damp cloth
- Empty drip tray – Prevent overflow and spills
- Keep K-cup holder clean – Remove used pods immediately
To prevent a bigger mess (and ensure a tasty brew), replace the water in the reservoir every time you make a cup of coffee.
Weekly Cleaning Tasks
- Wash removable parts – Use warm soapy water
- Clean water reservoir thoroughly – Rinse and dry completely
- Wipe down all surfaces – Include the drip tray area
- Check for coffee grounds – Remove any buildup
How to Clean Your Keurig Weekly step by step guied
What You’ll Need
Gather these supplies before starting:
- Warm soapy water – For removable parts
- Clean microfiber cloths – For wiping surfaces
- Soft brush or toothbrush – For detailed cleaning
- Paper towels – For drying
- Clean water – For rinsing
1: Unplug and Disassemble
- Turn off your Keurig completely
- Unplug the machine from power
- Remove the water reservoir
- Take out the K-cup holder
- Remove the drip tray
- Take apart any removable components
2: Clean Removable Parts
- Water reservoir: Wash with warm soapy water
- K-cup holder: Scrub gently to remove coffee oils
- Drip tray: Clean thoroughly and dry
- Lid: Wipe both sides carefully
3: Clean Internal Components
- Needle cleaning: Use a paperclip to clear clogs
- Exit needle: Clean the bottom puncture point
- Interior wiping: Use damp cloth on accessible areas
- Cup stand area: Remove any coffee residue
4: Clean the Exterior
- Control panel: Wipe gently with damp cloth
- Housing: Clean all external surfaces
- Cord area: Keep power cord clean and untangled
- Base: Clean underneath if needed
5: Reassemble Your Machine
- Dry all parts completely – Prevent water spots
- Replace components carefully – Ensure proper fit
- Refill with fresh water – Use filtered water if possible
- Plug in and test – Run a water-only cycle
Deep Cleaning: How to Clean Your Keurig with Descaling
Understanding Descaling
Descaling is an important part of cleaning your Keurig brewer. This process removes calcium deposits, or scale, that can build up inside a coffee maker over time.
When to Descale
- Descale light appears – Some models have indicators
- Slow brewing – Takes longer than usual
- Strange tastes – Mineral buildup affects flavor
- Reduced water flow – Clogs affect performance
Method 1: How to Clean Your Keurig with Official Descaling Solution
What You Need
- Keurig descaling solution – Official product recommended
- Fresh water – For rinsing cycles
- Large mug – To catch liquid
- Time – About 45 minutes total
Step-by-Step Process
Preparation Phase:
- Remove any K-cup from the machine
- Empty and clean the water reservoir
- Fill reservoir with descaling solution
- Add equal amount of water to solution
Descaling Phase:
- Place large mug on drip tray
- Start brew cycle without K-cup
- Use largest cup size setting
- Repeat until “add water” light appears
- Let machine sit for 30 minutes
Rinse Phase:
- Empty reservoir completely
- Fill with fresh water only
- Run multiple brew cycles
- Continue until no solution smell remains
- Run at least 12 rinse cycles
Method 2: How to Clean Your Keurig with White Vinegar
Vinegar Solution Benefits
- Cost-effective alternative – Cheaper than commercial solution
- Natural cleaning power – Dissolves mineral deposits
- Readily available – Most homes have vinegar
- Effective results – Removes buildup well
Important Vinegar Considerations
You can use white vinegar or citric acid solutions instead of a descaling solution. However, these alternatives may not be as effective as the specialized product designed by Keurig and could void your machine’s warranty.
Vinegar Descaling Steps
Mixing the Solution:
- Use white vinegar only – Never flavored types
- Mix equal parts water and vinegar
- Fill entire water reservoir with mixture
- Ensure thorough mixing
Cleaning Process:
- Run brew cycle with vinegar solution
- Use largest cup size setting
- Continue until reservoir empties
- Let solution sit in machine for 4 hours
- This allows deep cleaning action
Thorough Rinsing:
- Empty reservoir completely
- Fill with fresh water multiple times
- Run at least 15 rinse cycles
- Continue until vinegar smell disappears
- Taste test water-only brew
Method 3: How to Clean Your Keurig with Baking Soda
Baking soda is a gentle and effective cleaner that can help maintain your Keurig without leaving a strong aftertaste.
Baking Soda Process
- Mix solution: One tablespoon per cup of water
- Fill reservoir: With baking soda mixture
- Run cycles: Use normal brewing process
- Rinse thoroughly: Multiple water-only cycles
Troubleshooting: How to Clean Your Keurig When It’s Not Working
Common Problems and Solutions
Slow Brewing Issues
- Check for clogs – Clean exit needles
- Descale immediately – Heavy mineral buildup likely
- Replace water filter – If your model has one
- Clean thoroughly – Follow complete cleaning process
Strange Tastes in Coffee
- Run extra rinse cycles – Remove cleaning solution residue
- Replace water – Use fresh, filtered water
- Clean K-cup holder – Remove old coffee oils
- Check expiration dates – On cleaning products used
Machine Won’t Turn On After Cleaning
- Check power connection – Ensure proper plugging
- Dry all components – Water might cause issues
- Wait for complete drying – Allow 24 hours if needed
- Contact support – If problems persist
Advanced Tips: How to Clean Your Keurig Like a Pro
Professional Cleaning Techniques
Using Citric Acid
- Natural alternative – Food-safe cleaning option
- Mix properly – One tablespoon per cup water
- Effective descaling – Works like commercial products
- Rinse thoroughly – Multiple cycles needed
Needle Maintenance
- Regular inspection – Check monthly for clogs
- Gentle cleaning – Use paperclip or needle tool
- Both needles matter – Top and bottom need attention
- Safety first – Always unplug before needle cleaning
Water Filter Care
- Replace regularly – Every 2 months typically
- Proper installation – Follow manufacturer instructions
- Quality improvement – Reduces cleaning frequency
- Cost savings – Prevents excessive mineral buildup
Seasonal Deep Cleaning
Spring Cleaning Protocol
- Complete disassembly – Take apart everything possible
- Deep descaling – Use strongest recommended solution
- Filter replacement – Start fresh for the year
- Exterior detailing – Clean all surfaces thoroughly
Winter Preparation
- Extra descaling – Cold weather affects minerals
- Dry storage prep – If storing for season
- Component inspection – Check for wear and damage
- Preventive maintenance – Address small issues early
Water Quality and How to Clean Your Keurig Effectively
Understanding Your Water
A study by the United States Geological Survey found that most of the US suffers from hard water, with states in the Midwest and Southwest particularly affected.
Hard Water Effects
- Faster mineral buildup – More frequent cleaning needed
- Stronger solutions required – May need extra descaling
- Shorter component life – Parts wear out faster
- Taste impacts – Affects coffee flavor significantly
Water Solutions
- Use filtered water – Reduces mineral content
- Install water softener – For whole-house solution
- Buy distilled water – For occasional use
- Test water regularly – Monitor mineral levels
Preventing Future Problems
Best Practices
- Use quality water – Filtered preferred
- Regular maintenance – Don’t skip scheduled cleaning
- Proper storage – Keep in dry, clean environment
- Gentle handling – Avoid rough treatment
- Follow instructions – Use manufacturer guidelines
Long-term Care Strategy
- Keep cleaning log – Track maintenance dates
- Stock supplies – Have cleaning products ready
- Monitor performance – Notice changes early
- Professional service – Consider annual checkup
Environmental Considerations
Eco-Friendly Cleaning
- Natural solutions – Vinegar and baking soda options
- Minimal chemical use – Only when necessary
- Water conservation – Don’t waste during rinsing
- Proper disposal – Handle cleaning solutions safely
Sustainable Practices
- Extend machine life – Through proper maintenance
- Reduce replacements – Keep current machine working
- Energy efficiency – Clean machines work better
- Waste reduction – Fewer disposable cleaning products
When to Seek Professional Help
Service Indicators
- Persistent problems – Issues don’t resolve with cleaning
- Warranty coverage – Professional service included
- Complex repairs – Beyond basic maintenance
- Safety concerns – Electrical or mechanical issues
Finding Service
- Authorized dealers – Official Keurig service
- Local appliance repair – Qualified technicians
- Manufacturer support – Direct company help
- Online resources – Troubleshooting guides
Conclusion: Mastering How to Clean Your Keurig
Your Keurig works best when kept clean. Daily water changes and weekly part washing prevent most problems. Deep clean every three months with vinegar or store solutions. Hard water needs more frequent cleaning. Watch for slow brewing or bad taste as warning signs. Clean machines last longer and make better coffee every single time.