Want to learn makeup that looks natural? Seint makeup is perfect for you. This guide shows exactly how to apply Seint makeup for beginners. You will get beautiful results in just minutes.
What Makes Seint Makeup Special?

Seint makeup works differently than regular makeup. It uses cream colors instead of liquid foundation. The system highlights your best features. It also hides what you want to cover.
Why Choose Seint Makeup?
- Takes only 5-10 minutes daily
- Looks natural on your skin
- Stays put all day long
- Works for every skin type
- Easy to learn and master
- No heavy feeling on face
- Perfect for busy mornings
The Simple Seint System

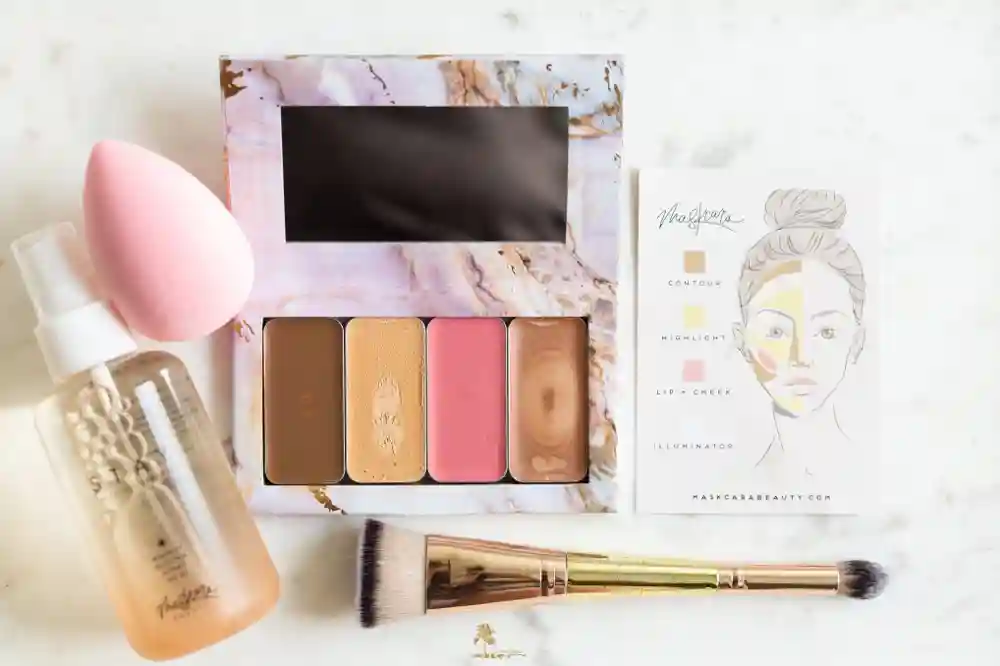
Seint uses something called IIID Foundation. This means you use different colors together. Each color has a job to do on your face.
Colors You Need
- Two highlight shades – these match your skin
- One contour color – this is darker than your skin
- One lip and cheek color – adds natural flush
- One illuminator – gives healthy glow (optional)
Getting the Right Tools
Good tools make applying makeup much easier. You need just a few basic brushes to start.
Basic Brush Set
- Blend brush – spreads makeup evenly
- Detail brush – works on small areas
- Blush brush – applies cheek color
- IIID brush – has two ends for different jobs
Other Helpful Items
- Clean makeup sponge
- Small towel
- Good mirror
- Bright light
- Tissue papers
Finding Your Perfect Colors

Getting the right colors is key to success. Wrong colors will not look natural on you.
Picking Highlight Shades
Your main highlight should match your neck exactly. Hold colors next to your neck in daylight. The right shade will disappear into your skin.
- Test on your jawline first
- Check in natural sunlight
- Ask someone else to look
- Take photos to compare
- Start with neutral tones
Choosing Contour Color
Pick a shade that is two tones darker than your skin. It should look like a natural shadow. Avoid colors that are too orange or too gray.
Selecting Lip and Cheek Color
Choose colors that look good when you blush naturally. Coral works for most people. Pink is good for fair skin. Berry tones suit deeper skin.
Step 1: Clean and Prep Your Face
Start with clean skin every time. This helps makeup go on smoothly.
Face Preparation Steps
- Wash with gentle cleanser
- Pat dry with clean towel
- Apply light moisturizer
- Wait five minutes
- Make sure hands are clean
Quick Prep Tips
Use oil-free moisturizer if your skin gets oily. Skip primer unless you have big pores. Let your moisturizer soak in completely before starting makeup.
Step 2: Apply Color Correcting Highlight
This step fixes dark areas on your face. Use the lighter highlight shade for this job.
Where to Apply
- Under both eyes
- Around your nose
- On any dark spots
- Over blemishes
- Areas that look tired
How to Apply
Take a small amount on your finger. Dab it on the dark areas. Use the detail brush to blend edges. Make sure there are no harsh lines.
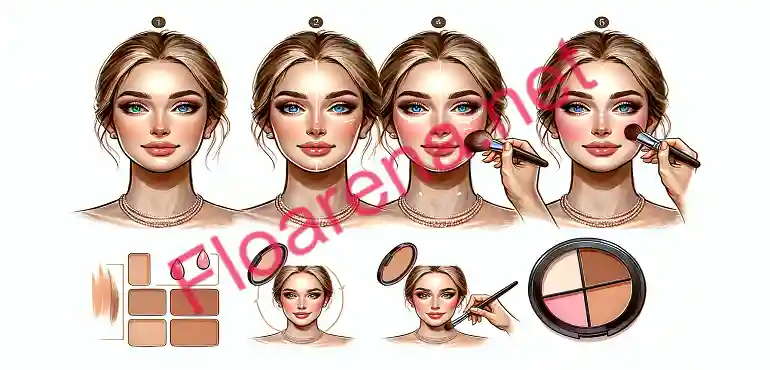
Step 3: Apply Main Highlight Shade
This color matches your skin tone perfectly. It goes on the parts of your face that catch light naturally.
Main Highlight Placement
- Down the nose bridge
- Under eyes in triangle shape
- Center of forehead
- Center of chin
- Top of cheekbones
- Along jawline
Application Method
Use the blend brush for this step. Take a small amount of product. Dab it on the areas listed above. Blend outward in small circles. Work quickly while the product is fresh.
Step 4: Add Contour for Shape
Contour creates shadows where they should naturally be. This step gives your face more shape and definition.
Where Contour Goes
- Sides of nose
- Under cheekbones
- Sides of forehead
- Under jawline
- Temples
- Sides of chin
Contour Application Tips
Use the other end of your IIID brush. Apply very lightly at first. You can always add more later. Blend well so there are no visible lines. The goal is natural-looking shadows.
Step 5: Blend Everything Together
Good blending makes or breaks your makeup look. This step is crucial for natural results.
Blending Technique
- Use the blend brush in circular motions
- Work from center of face outward
- Check for harsh lines
- Add more product if needed
- Use damp sponge for final blend
Blending Tips
Work while the makeup is still fresh. Cream makeup blends best when it is warm. If it gets too dry, warm it with your finger first.
Step 6: Add Cheek Color
Cheek color brings life to your face. It should look like you just exercised or came in from the cold.
Cheek Application Steps
- Smile to find the apple of your cheeks
- Dab color on the rounded part
- Blend upward toward your ear
- Keep it light and natural
- Build slowly if you want more color
Cheek Color Tips
Start with very little product. You can always add more. Natural cheek color should fade as it goes toward your ear. Never make harsh lines with cheek color.
Step 7: Perfect Your Lips
Use the same color you used on your cheeks. This creates a natural, coordinated look.
Lip Application Method
- Apply directly to lips
- Use your finger to blend edges
- Add more for deeper color
- Keep lip lines clean
- Blot if too bright
Lip Tips
Warm the product on your finger first. This makes it easier to spread. Always start in the center and work outward. Use a lip brush for very precise lines.
Step 8: Add Final Glow
Illuminator gives your skin a healthy, natural glow. Use it sparingly for best results.
Illuminator Placement
- Top of cheekbones
- Bridge of nose
- Inner eye corners
- Center of eyelids
- Cupid’s bow on lips
Glow Application Tips
Less is always more with illuminator. Build it slowly until you get the look you want. Blend it well with other products. The glow should look like it comes from within.
Quick Daily Routine
Once you learn the basics, your daily routine becomes very fast.
5-Minute Morning Look
- Apply color correcting highlight
- Add main highlight shade
- Quick contour blend
- Dab on cheek color
- Swipe lips with same color
- Blend everything together
Time-Saving Tips
Keep your colors in one palette. Have your brushes ready each morning. Practice the routine on weekends. Soon it will become automatic.
Taking Care of Your Products
Proper care makes your makeup last longer and work better.
Daily Care
- Close compacts tightly
- Clean brushes weekly
- Store in cool place
- Keep away from heat
- Wipe compacts clean
Weekly Maintenance
- Deep clean all brushes
- Check product freshness
- Organize your palette
- Replace old products
- Clean your workspace
Common Problems and Easy Fixes
Every beginner faces some challenges. Here are simple solutions.
Makeup Looks Streaky
- Use less product
- Blend more thoroughly
- Clean your brushes
- Apply in thinner layers
- Use damp sponge to smooth
Colors Look Wrong
- Check lighting when applying
- Test colors on your neck
- Blend edges better
- Try warming product first
- Mix colors if needed
Makeup Fades Quickly
- Use primer on oily areas
- Set with light powder
- Apply in thin layers
- Let each layer dry
- Touch up during day
Different Looks You Can Create
Seint makeup works for many different occasions and styles.
Natural Day Look
- Light highlight coverage
- Soft contour blend
- Natural cheek color
- Subtle lip color
- No illuminator needed
Work Professional Look
- Medium highlight coverage
- Defined but soft contour
- Professional cheek color
- Polished lip color
- Light illuminator touch
Evening Special Look
- Full highlight coverage
- Stronger contour definition
- Richer cheek color
- Bold lip color
- Glowing illuminator finish
Mobile-Friendly Application Tips
Most people check their makeup on phones. Make sure your look photographs well.
Photo-Ready Tips
- Check makeup in phone camera
- Use natural light when possible
- Take photos from different angles
- Adjust if needed for photos
- Practice selfie-ready looks
Screen-Time Considerations
Long screen time can make makeup look different. Check your appearance regularly. Touch up if needed. Good lighting helps during video calls.
Building Confidence
Practice builds confidence with your new makeup routine.
Weekly Practice Plan
- Monday – basic highlight and contour
- Tuesday – add cheek color
- Wednesday – perfect lip application
- Thursday – practice full routine
- Friday – try evening look
- Weekend – experiment with new techniques
Confidence Building Tips
Start simple and build skills slowly. Take photos to track your progress. Watch yourself improve each week. Ask friends for honest feedback. Celebrate small wins along the way.
Shopping Smart for Seint
Make smart choices when buying your first Seint products.
Budget-Friendly Start
- Buy basic four-color palette
- Get essential brush set
- Start with neutral colors
- Add products slowly over time
- Focus on learning first
Money-Saving Tips
- Use one lip and cheek color
- Buy during sales events
- Share costs with friends
- Start with sample sizes
- Invest in good brushes first
Skin Type Considerations
Different skin types need slightly different approaches.
Oily Skin Tips
- Use oil-free moisturizer first
- Apply powder lightly
- Blot during the day
- Clean brushes more often
- Use less product overall
Dry Skin Advice
- Moisturize well before makeup
- Use damp sponge for blending
- Avoid powder on dry areas
- Keep products from getting too dry
- Hydrate skin regularly
Sensitive Skin Guidelines
- Test products on small area first
- Use gentle application pressure
- Choose fragrance-free products
- Remove makeup gently each night
- Give skin breaks from makeup
Advanced Techniques for Later
Once you master the basics, try these advanced methods.
Color Mixing
- Mix highlight shades for perfect match
- Blend contour colors for custom depth
- Create unique lip colors
- Adjust for seasonal skin changes
- Make products work harder
Precision Techniques
- Use detail brush for exact placement
- Create sharp contour lines
- Perfect symmetry between sides
- Fine-tune color intensity
- Master professional blending
Final Success Tips
These tips will help you succeed with Seint makeup from day one.
Daily Success Habits
- Practice in good lighting
- Take your time at first
- Keep tools clean and ready
- Take progress photos
- Ask for help when needed
Long-Term Success
- Stay consistent with practice
- Learn from mistakes
- Try new techniques slowly
- Build your collection gradually
- Enjoy the process
Conclusion
Learning how to apply Seint makeup for beginners is simple with practice. Start with basic highlight and contour techniques. Use the right colors for your skin tone. Blend everything well for natural results. Take your time and be patient. Soon you will master this easy makeup system. Your daily routine will become quick and effortless. Enjoy creating beautiful looks that enhance your natural features every day.


